@byxiaoxie5 年前
04/19
20:23
测试搭建环境 系统 [Ubuntu 20.04]
SRS项目地址:https://github.com/ossrs/srs
安装需要用到的软件包
apt-get install make
apt-get install gcc
apt-get install libssl-dev
apt-get install golang
apt-get install git
apt-get install python下载SRS项目
git clone https://github.com/ossrs/srs.git切换4.0版本 [默认版本为3.0,没有RTC所以需要4.0版本]
cd srs/
git checkout 4.0release //切换最新版本
git branch -v //查看当前版本编译SRS
cd trunk/
./configure --with-hls --with-ssl --with-http-server --with-http-callback --with-http-api --with-ingest --with-stream-caster
make编译完成后修改配置文件
vim conf/rtc.conf
找到[bframe discard]删除他 (原因我也不清楚这个会导致播放卡住)
修改后:
rtc {
enabled on;
}
保存配置文件
配置文件部分说明:
listen 1935; //串流端口
listen 8080; //HTTP端口
listen 1985; //API端口(一般不修改)
listen 8000; //UDP端口(一般不修改)
http_remux {
enabled on;
mount [vhost]/[app]/[stream].flv;
hstrs on; //添加这个可拉流flv
}
启动RTC
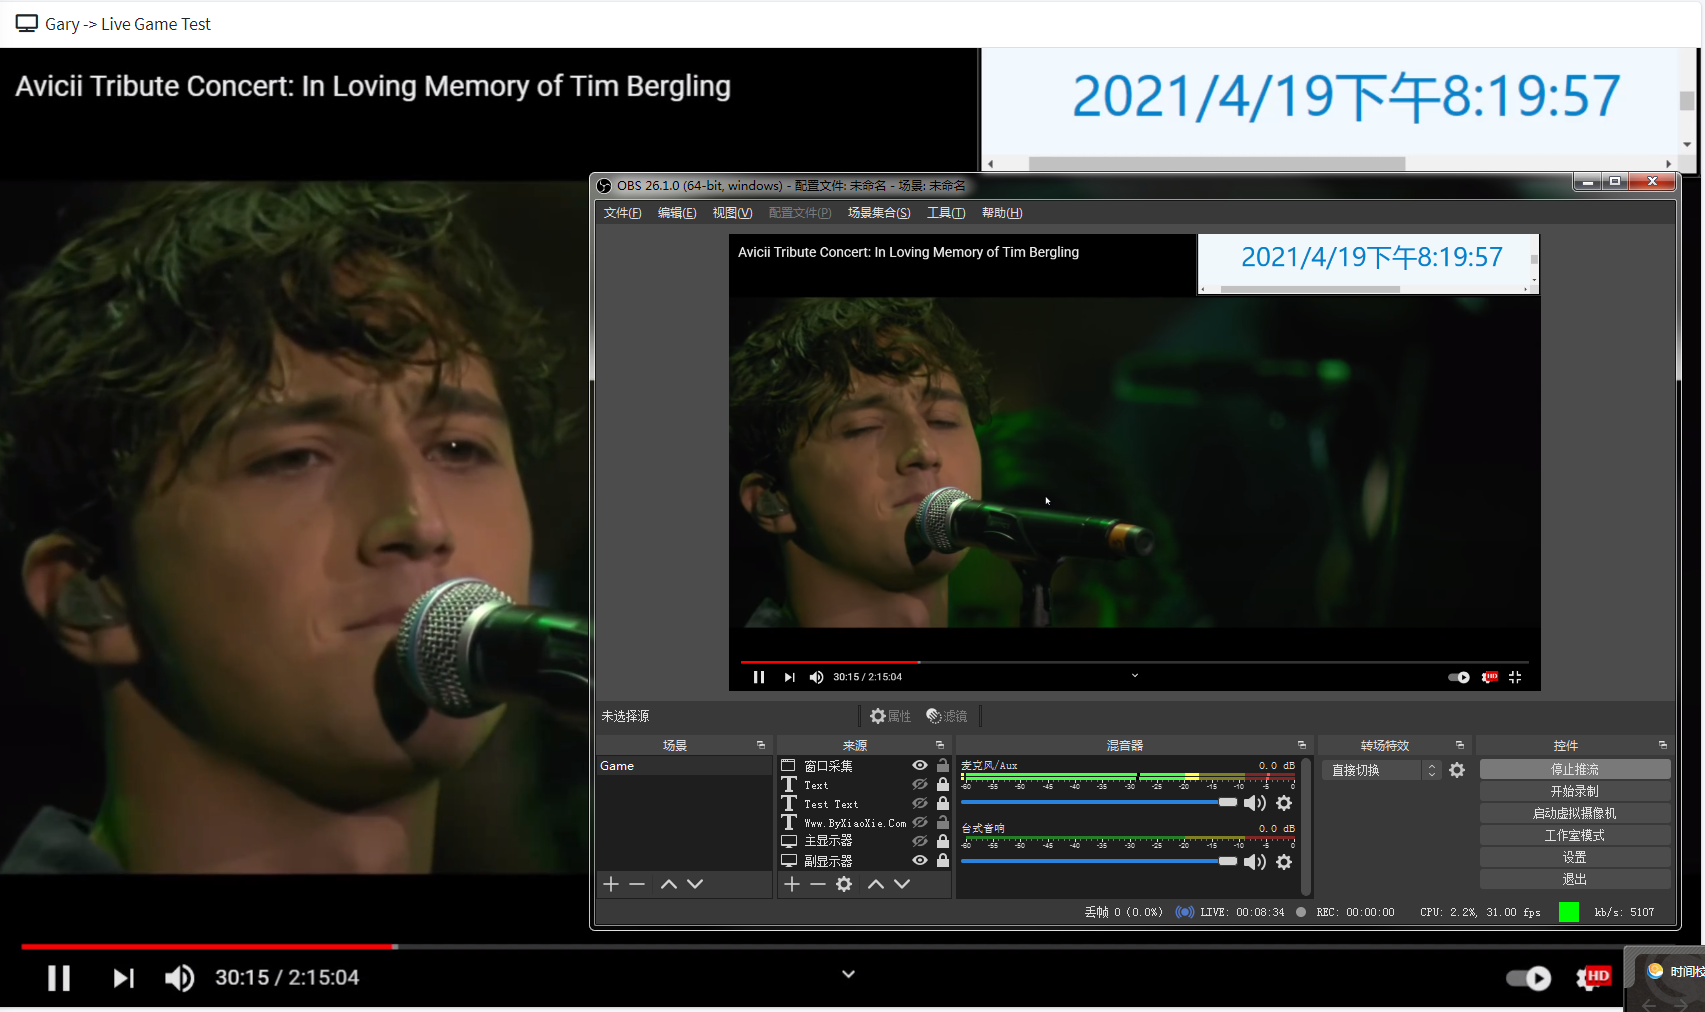
./objs/srs -c conf/rtc.confOBS推流设置
服务器:rtmp://127.0.0.1/live/
串流秘钥:myname
播放地址:

webrtc          webrtc://127.0.0.1/live/myname         (端口1985可以不用填写因为webrtc默认端口是1985)
rtmp            rtmp://127.0.0.1:1935/live/myname      (端口1935可以不用填写因为RTMP默认端口是1935除非修改了)
http/flv	http://127.0.0.1:8080/live/myname.flv  (端口8080是HTTP端口如果修改过输入对应的端口即可)
http/m3u8	http://127.0.0.1:8080/live/myname.m3u8 (端口8080是HTTP端口如果修改过输入对应的端口即可)

SRS测试地址:http://127.0.0.1:8080/players/rtc_player.html
如果外网无法播放RTC打开rtc.conf配置文件修改
candidate $CANDIDATE; //搜索找到这个
外网无法播放把 [$CANDIDATE] 修改成你的外网IP
例子: candidate 101.28.1.1;
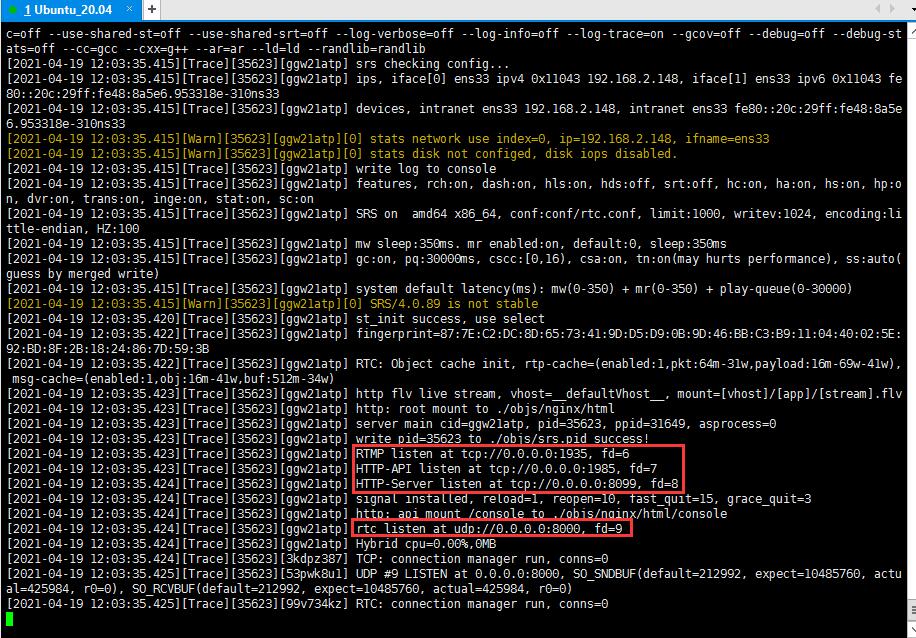
或者尝试访问 webrtc://127.0.0.1/live/myname?eip=101.28.1.1启动后可以看到端口信息:
WebRTC测试效果(延迟1秒以下,测试图非局域网情况下测试的,网络不好的情况下1~3秒):