@byxiaoxie2 周前
07/5
19:29

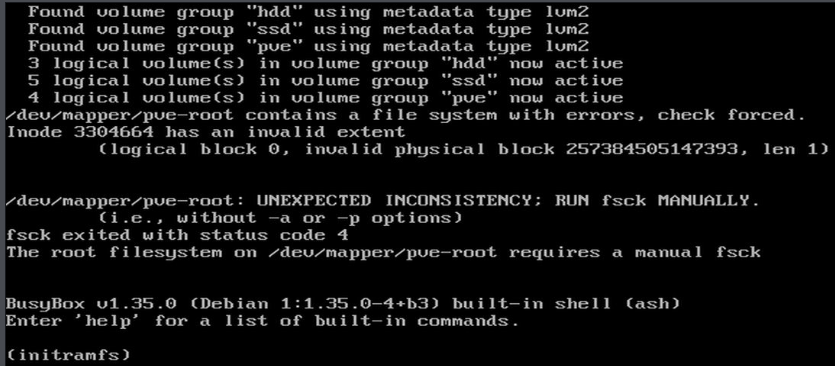
断电后开机自动进入 BusyBox 模式

报错信息:
/dev/mapper/pve-root: UNEXPECTED INCONSISTENCY; RUN fsck MANUALLY.
fsck exited with status code 4
The root filesystem on /dev/mapper/pve-root requires a manual fsck
(initramfs)

修复指令:
fsck.ext4 -f -y /dev/mapper/pve-root

-f 强制检查、即使文件系统被标记为干净
-y 自动回答所有提示(全部修复)

修复完成后执行 exit 重启即可1. 安装温度查询工具
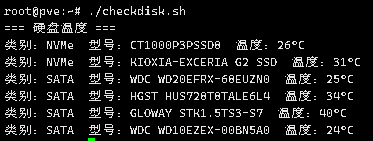
apt install lm-sensors nvme-cli smartmontools -y2. Shell脚本
#!/bin/bash
echo "=== 硬盘温度 ==="
# NVMe 硬盘
for disk in $(ls /dev/nvme[0-9]n1 2>/dev/null); do
model=$(lsblk -no MODEL $disk | tr -d '\n')
temp=$(nvme smart-log $disk | grep "temperature" | awk '{print $3}' | sed 's/[^0-9]//g')
if [ -n "$model" ] && [ -n "$temp" ]; then
echo -e "类别:NVMe 型号:$model 温度:$temp°C"
fi
done
# SATA 硬盘
for disk in $(ls /dev/sd[a-z] 2>/dev/null); do
model=$(lsblk -no MODEL $disk | tr -d '\n')
temp=$(smartctl -A $disk | grep "Temperature_Celsius" | awk '{print $10}' | sed 's/[^0-9]//g')
if [ -n "$model" ] && [ -n "$temp" ]; then
echo -e "类别:SATA 型号:$model 温度:$temp°C"
fi
done效果图:
小鸡硬盘只有 10G 不得不压榨了,所以快占满了记录一下清理

查询文件大小并只显示30条:
sudo du -ahx / | sort -rh | head -n 30

发现 journal 日志占用了3G
3.1G /var/log/journal/5465c535145418****

清理 journal 日志:
sudo journalctl --vacuum-size=100M // 限制日志大小(非必要)
sudo journalctl --vacuum-time=7d // 根据时间清理

清理前必须查看是否有重要的日志,因为这个是系统日志包括了 系统日志、用户日志、应用程序日志

清理 apt 缓存:
sudo apt-get clean

使用 logrotate 清理日志文件:
sudo logrotate -f /etc/logrotate.conf  //立即触发日志轮换并清理

批量清理所有日志文件 (非常不建议):
sudo find /var/log -type f -exec truncate -s 0 {} \;  // 删除所有日志内容,不删除文件

删除压缩的旧日志:
sudo find /var/log -type f -name "*.gz" -exec rm -f {} \;
sudo find /var/log -type f -name "*.1" -exec rm -f {} \;

删除超过指定时间的日志文件:
sudo find /var/log -type f -mtime +30 -exec rm -f {} \;
压榨前:
root@byxiaoxie:~# df -h
Filesystem Size Used Avail Use% Mounted on
tmpfs       47M 996K   46M   3% /run
/dev/vda2  9.9G 9.1G  224M  98% /
tmpfs      234M  20K  234M   1% /dev/shm
tmpfs      5.0M    0  5.0M   0% /run/lock
tmpfs       47M    0  47M    0% /run/user/0

压榨后:
root@byxiaoxie:~# df -h
Filesystem      Size  Used Avail Use% Mounted on
tmpfs            47M  996K   46M   3% /run
/dev/vda2       9.9G  7.6G  1.8G  82% /
tmpfs           234M   40K  234M   1% /dev/shm
tmpfs           5.0M     0  5.0M   0% /run/lock
tmpfs            47M     0   47M   0% /run/user/0
1. 安装必要的软件包
apt-update && apt-get install lm-sensors -y
2. 安装完成后执行指令 [sensors]
root@pve:~# sensors
amdgpu-pci-0500
Adapter: PCI adapter
vddgfx: 1.44 V
vddnb: 937.00 mV
edge: +50.0°C
PPT: 14.00 W
nvme-pci-0400
Adapter: PCI adapter
Composite: +53.9°C (low = -5.2°C, high = +79.8°C)
(crit = +84.8°C)
k10temp-pci-00c3
Adapter: PCI adapter
Tctl: +52.8°C
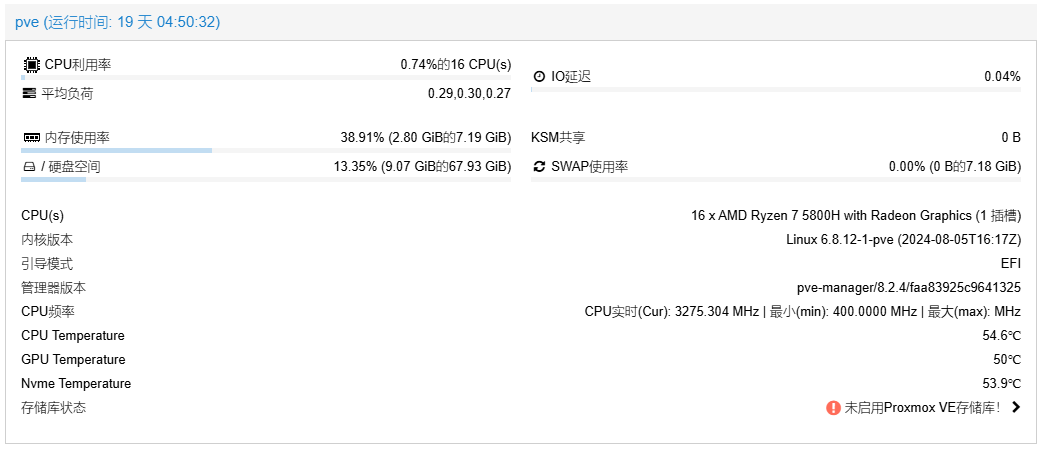
3. 下面代码的正则表达式需要按照上面的输出文本进行调整
4. 找到文件 [Nodes.pm] 路径:[/usr/share/perl5/PVE/API2]
搜索代码关键字:
$dinfo = df('/', 1);

在它的下面添加代码:
$res->{CPUtemperature} = `sensors`;
$res->{GPUtemperature} = `sensors`;
$res->{Nvmetemperature} = `sensors`;

修改后的样子:
my $dinfo = df('/', 1);     # output is bytes
$res->{CPUtemperature} = `sensors`;
$res->{GPUtemperature} = `sensors`;
$res->{Nvmetemperature} = `sensors`;

$res->{rootfs} = {
    total => $dinfo->{blocks},
    avail => $dinfo->{bavail},
    used => $dinfo->{used},
    free => $dinfo->{blocks} - $dinfo->{used},
};

return $res;
5. 找到文件 [pvemanagerlib.js] 路径:[/usr/share/pve-manager/js]
搜索代码找到关键字 [PVE.node.StatusView]:
Ext.define('PVE.node.StatusView', {})

关键字下面找到高度:
height: 350, // 按需求增加高度 例如我自己的是:height: 450

添加温度显示代码,找到 [items] 在代码中添加:
{
    itemId: 'CPUtemperature',
    colspan: 2,
    printBar: false,
    title: gettext('CPU Temperature'),
    textField: 'CPUtemperature',
    renderer: function(value){
        const regex = /Tctl:\s+([-+]?[0-9]*\.?[0-9]+)/;
        const match = value.match(regex);
        const temperature = match ? parseFloat(match[1]) : null;
        return ` ${temperature}℃`;
    }
},
{
    itemId: 'GPUtemperature',
    colspan: 2,
    printBar: false,
    title: gettext('GPU Temperature'),
    textField: 'GPUtemperature',
    renderer: function(value){
        const regex = /edge:\s+([-+]?[0-9]*\.?[0-9]+)/;
        const match = value.match(regex);
        const temperature = match ? parseFloat(match[1]) : null;
        return ` ${temperature}℃`;
    }
},
{
    itemId: 'Nvmetemperature',
    colspan: 2,
    printBar: false,
    title: gettext('Nvme Temperature'),
    textField: 'Nvmetemperature',
    renderer: function(value){
        const nvmeTemps = Array.from(value.matchAll(/Composite.*?\+([\d\.]+)?/g), m=>m[1]);
        return nvmeTemps.map((element, index) => `${element}℃`).join(' | ');
    }
}

添加完成后重启PVE面板:
systemctl restart pveproxy
##方法1
	在[lib]目录下创建文件夹
	org -> apache -> catalina -> util -> Serverinfo.properties
	将 [Serverinfo.properties] 里面的版本号修改掉或删除保存后运行即可

[Serverinfo.properties] 原文件内容
	# Licensed to the Apache Software Foundation (ASF) under one or more
	# contributor license agreements.  See the NOTICE file distributed with
	# this work for additional information regarding copyright ownership.
	# The ASF licenses this file to You under the Apache License, Version 2.0
	# (the "License"); you may not use this file except in compliance with
	# the License.  You may obtain a copy of the License at
	#
	#     http://www.apache.org/licenses/LICENSE-2.0
	#
	# Unless required by applicable law or agreed to in writing, software
	# distributed under the License is distributed on an "AS IS" BASIS,
	# WITHOUT WARRANTIES OR CONDITIONS OF ANY KIND, either express or implied.
	# See the License for the specific language governing permissions and
	# limitations under the License.

	server.info=Apache Tomcat/8.5.93
	server.number=8.5.93.0
	server.built=Aug 23 2023 22:43:14 UTC

##方法2
	在 [lib] 找到 [catalina.jar] 使用压缩软件打开或解包也可以
	找到路径: org -> apache -> catalina -> util -> Serverinfo.properties
	和上面方法一样修改里面内容后重新打包回去 [catalina.jar] 即可
-- Www.ByXiaoXie.Com
-- Shatterline Auto B-HOP Logitech Lua

local Start = false

function OnEvent(event, arg)
	if (IsMouseButtonPressed(5)) then
		if (Start == false) then
			PressKey("lctrl")
			Sleep(100)
			ReleaseKey("lctrl")
			for i = 0, 40 do
				PressAndReleaseKey("spacebar")
				MoveMouseRelative(100, 0)
				Sleep(1)
			end
			for i = 0, 40 do
				PressAndReleaseKey("spacebar")
				MoveMouseRelative(-100, 0)
				Sleep(1)
			end
			Start = true
		end
		repeat
			if (Start) then
				PressAndReleaseKey("spacebar")
				Sleep(20)
			end
		until not IsMouseButtonPressed(5)
		Start = false
	end
end
鼠标按键说明:按住鼠标侧键上(前进键)
BHOP使用方法:跑起来后按住鼠标侧键上(前进键) 马上松开W即可自动连跳
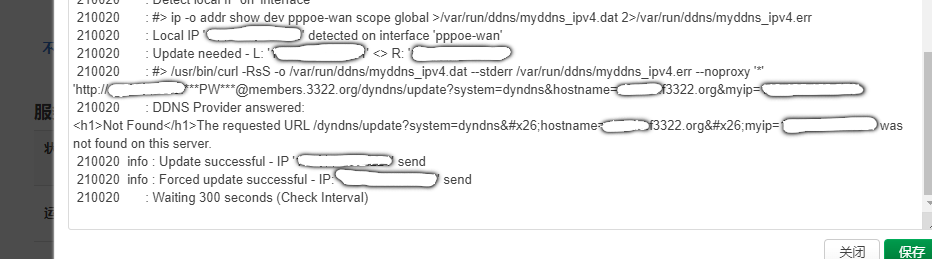
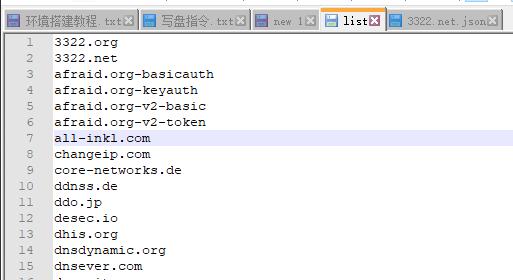
修改列表文件:
	路径:/usr/share/ddns/list
	在列表中添加一行名称为 [3322.net] 然后保存

修改Json文件:
	路径:/usr/share/ddns/default
	将原来的 [3322.org.json] 复制一份副本然后名称修改为 [3322.net.json]

	修改Json内容:
		[3322.org] 名称修改为 [3322.net]
		[members.3322.org] 更改为 [members.3322.net]

		然后保存返回Openwrt 动态DDNS 页面编辑更换 DDNS服务供应商 为 [3322.net] 即可

		例子:
		{
			"name": "3322.net",
			"ipv4": {
				"url": "http://[USERNAME]:[PASSWORD]@members.3322.net/dyndns/update?system=dyndns&hostname=[DOMAIN]&myip=[IP]"
			}
		}

系统环境:Windows 10 1909 显卡:GTX 1060 CPU:I7 8700k (测试GPU算法修复动漫图片 5s 跑完4X修复)CUDA 下载并安装:
Docs文档(用于查询对应版本):https://docs.nvidia.com/cuda/cuda-toolkit-release-notes/index.html
CUDA下载:https://developer.nvidia.com/cuda-toolkit-archive
Anaconda 下载安装:
官方地址:https://www.anaconda.com/
安装完成后需配置环境变量
例子 Path:D:\Anaconda3\condabin
Anaconda 创建虚拟环境:
conda create -n 名称 jupyter notebook cudnn
预先安装第三方库 jupyter notebook cudnn
cudnn 用于深度神经网络的 GPU 加速库
jupyter notebook 交互式编辑器
例子 conda create -n gary jupyter notebook cudnn
切换到新的虚拟环境
activate 名称
例子 activate gary
切换后可用 [conda env list] 查看是否切换成功
报错信息:
Collecting package metadata (current_repodata.json): failed
CondaSSLError: Encountered an SSL error. Most likely a certificate verification issue.
Exception: HTTPSConnectionPool(host='repo.anaconda.com', port=443): Max retries exceeded with url: /pkgs/main/win-64/current_repodata.json (Caused by SSLError("Can't connect to HTTPS URL because the SSL module is not available."))
解决方法:
配置环境变量 Path: D:\Anaconda3\Library\bin开始部署 Real-ESRGAN :
Github:https://github.com/xinntao/Real-ESRGAN
1. 先安装PyTorch 地址:https://pytorch.org/get-started/locally/
2. 下载仓库代码 git clone https://github.com/xinntao/Real-ESRGAN.git
3. pip install -r requirements.txt
4. 下载已经训练好的模型
wget https://github.com/xinntao/Real-ESRGAN/releases/download/v0.1.0/RealESRGAN_x4plus.pth -P weights
5. 执行测试 -n 模型名称 -i 输入的目录或文件 --face_enhance 人脸修复(官方文档上提示是不建议修复动漫图片的)
python inference_realesrgan.py -n RealESRGAN_x4plus -i inputs --face_enhance
6. 即可输出测试的动漫图片高清修复
# 只需要在升级页面上URL加上参数,就可以跳转到验证会员了

# URL参数
&thankyou=1

# 推荐使用 uBlock Origin [Adblock Plus 现在很多都无法拦截]
https://github.com/gorhill/uBlock