@byxiaoxie7 年前
06/9
03:36

下载地址:https://pan.baidu.com/s/1uKxY9q3pXqoG9taukDCCIw 提取码:xg59
下载地址:https://pan.baidu.com/s/1uKxY9q3pXqoG9taukDCCIw 提取码:xg59微信防撤回:https://www.byxiaoxie.com/?p=428
破解方法 ByXiaoXie.Com

定位到DLL文件[WeChatWin.dll]

方法1:
搜索字符串找到 [WeChat_App_Instance_Identity_Mutex_Name]


方法2:
直接搜索特征码然后把je跳转到函数结束的地址去
74 ?? 66 83 3E ?? 8B C6 75 ?? B8 ?? ?? ?? ?? 50 6A ?? 6A ?? FF 15 ?? ?? ?? ?? 8B F8 32 DB 85 FF 74 ?? FF 15 ?? ?? ?? ?? 3D ?? ?? ?? ?? 75 ?? 57 B3 ?? FF 15 ?? ?? ?? ?? EB ?? 89 3D //该特征码过期

74 ?? 56 6A 00 68 ?? ?? ?? ?? FF 15 ?? ?? ?? ?? 8B F0 85 F6  //新特征码

74 ?? 66 83 3E 00 8B C6 75 ?? B8 ?? ?? ?? ?? 50 6A 00 6A 00  //22-01-24 新特征码 [修改方法不变]
新版本3.2.1.154修改方法:
原型:039B07E7 /74 56 je short 039B083F
修改后:039B07E7 /EB 56 jmp short 039B083F
已过期的老版本方法:
原型:0FE973B1 |. /74 08 je XWeChatWi.0FE973BB
修改跳转地址到:104A5EAE |> \5F pop edi
修改后:0FE973B1 /EB 5B jmp XWeChatWi.0FE9740E
保存后即可多开微信!安装 [EPEL] 和 [IUS] 软件源
IUS获取地址:https://ius.io/setup
yum install epel-release -y
yum install https://centos7.iuscommunity.org/ius-release.rpm -y
安装 Python3.6
yum install python36u -y
yum install python36u-devel -y
安装 pip3
yum install python36u-pip -y链接符修改 (非必要)
ln -s /bin/python3.6 /bin/python3
ln -s /bin/pip3.6 /bin/pip3测试是否安装完成
python3.6 -V
返回信息:Python 3.6.8 (安装完成)
pip3.6 -V
返回信息:pip 9.0.1 from /usr/lib/python3.6/site-packages (python 3.6) (安装完成)编译环境参考官方要求: https://openwrt.org/docs/guide-developer/build-system/install-buildsystem
虚拟机系统 Ubuntu 16.04.5 硬盘80G 内存4G (ubuntu编译不可用root!)
系统安装好后开始安装编译环境和下载源代码
Ubuntu 12.04 LTS :
sudo apt-get install build-essential subversion git-core libncurses5-dev zlib1g-dev gawk flex quilt libssl-dev xsltproc libxml-parser-perl mercurial bzr ecj cvs unzip
Master or HEAD (main development tree) :
sudo git clone https://git.openwrt.org/openwrt/openwrt.git
然后设置下文件权限 chown -R <组名>:<用户名> <目录> 如:sudo chown -R xiaoxie:xiaoxie openwrt/
然后 ./openwrt/scripts/feeds update -a 好了以后输入安装 ./openwrt/scripts/feeds install -a
开始编译 先进入目录 cd openwrt/ 然后 make menuconfig
选 Target System 进去后选择自己路由器的平台(我的是MTK所以我选MTK的平台)
Subtarget 选择MTK的型号我的是 MT7620
Target Profile 选择自己路由器的型号没有的话默认就可以了 (这里我选的是 Asus RT-N14u)
Target Images 镜像类型 选择你需要的类型
其他默认先不改 进去 LuCI 看看有什么需要的软件包 <M>编译软件包 [*]内置 选择好后一直 exit 退出就可以之后开始编译成固件 make V=99 单线程编译 make -j 12 V=99 12线程编译
编译出来后的固件路径:/home/xiaoxie/openwrt/bin/targets/ramips/mt7620
固件文件:CPU型号-设备名-sysupgrate.bin编译出错解决方法:
错误信息: /home/xiaoxie/openwrt/include/toplevel.mk:216: recipe for target 'world' failed
解决方法:固件容量不足

wget -qO- --no-check-certificate https://raw.githubusercontent.com/oooldking/script/master/superbench.sh | bash
破解方法 ByXiaoXie.Com

定位到DLL文件[WeChatWin.dll]

方法1:
搜索字符串找到 [revokemsg]


方法2:
直接搜索特征码然后把第一个 call 地址 nop 掉
75 ?? 6A ?? 0F 57 C0 C7 45 ?? ?? ?? ?? ?? 68 ?? ?? ?? ?? 8D 4D ?? 0F 11 45 ?? E8 ?? ?? ?? ?? 8D 45 ?? C7 45 ?? ?? ?? ?? ?? 50 8D 4D

6A FF 68 ?? ?? ?? ?? 8D 4D C4 E8 ?? ?? ?? ?? 8D 45 C4 C7 45 EC 01 00 00 00 50 8D 4D 08 E8 ?? ?? ?? ?? C6 45 F3 00 84 C0 75 ?? C6 45 F3 01 F6 45 EC 01 //22-01-24 新特征码 [修改方法不变]视频下载地址:https://pan.baidu.com/s/1O0ZVLFuhDpv1HWAnlVGqew 提取码:ri4i
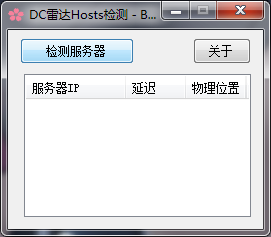

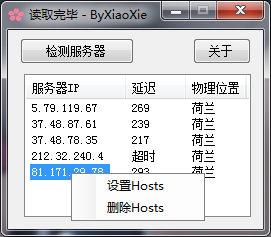
下载地址:https://pan.baidu.com/s/1H4jND-7YEe6y-gz7y7y6rA 提取码:y2wz私人服务器是站长自己掏钱买的,请不要恶意破坏,赞助可以联系QQ:645993600添加的时候请写上内容!更新日志:
V1.1:显示最新官方服务器地址
V1.2:修复物理位置错误
V1.3:添加延迟及丢包率检测
V1.4:添加新服务器列表
V1.5:添加切换语言[英语]
V1.6:单文件双语言[中英]wget http://people.redhat.com/~rjones/virt-what/files/virt-what-1.12.tar.gz
tar zxvf virt-what-1.12.tar.gz
cd virt-what-1.12/
./configure
make && make install测试指令
virt-what此方法仅用与[ubuntu debian centos]系统
服务器:系统平台[Debian 8 x64]
小流量VPS不建议使用,因为使用 net-speeder 会消耗双倍流量
官方脚本:https://github.com/snooda/net-speeder一键脚本[debian ubuntu]使用
wget –no-check-certificate https://raw.githubusercontent.com/tennfy/debian_netspeeder_tennfy/master/debian_netspeeder_tennfy.sh
chmod a+x debian_netspeeder_tennfy.sh
bash debian_netspeeder_tennfy.sh
一键脚本[centos]使用
wget --no-check-certificate https://gist.github.com/LazyZhu/dc3f2f84c336a08fd6a5/raw/d8aa4bcf955409e28a262ccf52921a65fe49da99/net_speeder_lazyinstall.sh
sh net_speeder_lazyinstall.sh
查看 net-speeder 是否运行
ps aux|grep net_speeder|grep -v grep

停止net-speeder
killall net_speeder

启动net-speeder(KVM环境)
nohup /root/net_speeder eth0 "ip" >/dev/null 2>&1 &
启动net-speeder(openvz环境)
nohup /root/net_speeder venet0 "ip" >/dev/null 2>&1 &
此方法仅用与[centos 7+]系统 KVZ架构  (其他自行测试)
服务器:系统平台[centos 7]
要求:boot分区不小于500M(太小可能导致安装内核失败)

一键脚本安装

wget http://down.08mb.com/tcp_opz/tcpa/tcpa.sh

sh tcpa.sh
新增端口 (默认只加速80,443,8080)
vim /usr/local/storage/tcpav2/start.sh
找到["$ip" != "127.0.0.1"]后添加到if下面,fi结尾
$BINDIR/$CTLAPP access add tip $ip tport SS端口或其他端口启动tcpa拥塞算法
cd /usr/local/storage/tcpav2
sh start.sh查看是否开启成功
smod|grep tcpa
返回以下内容则启动成功
tcpa_engine 224249 0卸载方法
cd /usr/local/storage/tcpav2
sh uninstall.sh