@byxiaoxie6 年前

05/28
11:26
Home

OpenWrt 编译教程

编译环境参考官方要求: https://openwrt.org/docs/guide-developer/build-system/install-buildsystem

虚拟机系统 Ubuntu 16.04.5 硬盘80G 内存4G (ubuntu编译不可用root!)

系统安装好后开始安装编译环境和下载源代码

Ubuntu 12.04 LTS :
sudo apt-get install build-essential subversion git-core libncurses5-dev zlib1g-dev gawk flex quilt libssl-dev xsltproc libxml-parser-perl mercurial bzr ecj cvs unzip

Master or HEAD (main development tree) :
sudo git clone https://git.openwrt.org/openwrt/openwrt.git

然后设置下文件权限 chown -R <组名>:<用户名> <目录> 如:sudo chown -R xiaoxie:xiaoxie openwrt/

然后 ./openwrt/scripts/feeds update -a 好了以后输入安装 ./openwrt/scripts/feeds install -a

开始编译 先进入目录 cd openwrt/ 然后 make menuconfig

选 Target System 进去后选择自己路由器的平台(我的是MTK所以我选MTK的平台)

Subtarget 选择MTK的型号我的是 MT7620

Target Profile 选择自己路由器的型号没有的话默认就可以了 (这里我选的是 Asus RT-N14u)

Target Images 镜像类型 选择你需要的类型

其他默认先不改 进去 LuCI 看看有什么需要的软件包 <M>编译软件包 [*]内置 选择好后一直 exit 退出就可以之后开始编译成固件 make V=99 单线程编译 make -j 12 V=99 12线程编译

编译出来后的固件路径:/home/xiaoxie/openwrt/bin/targets/ramips/mt7620
固件文件:CPU型号-设备名-sysupgrate.bin
编译出错解决方法:

错误信息: /home/xiaoxie/openwrt/include/toplevel.mk:216: recipe for target 'world' failed
解决方法:固件容量不足


OpenWrt 编译教程

@byxiaoxie6 年前

04/5
18:29
Home

PC微信防撤回破解教程

破解方法 ByXiaoXie.Com

定位到DLL文件[WeChatWin.dll]

方法1:
搜索字符串找到 [revokemsg]


方法2:
直接搜索特征码然后把第一个 call 地址 nop 掉
75 ?? 6A ?? 0F 57 C0 C7 45 ?? ?? ?? ?? ?? 68 ?? ?? ?? ?? 8D 4D ?? 0F 11 45 ?? E8 ?? ?? ?? ?? 8D 45 ?? C7 45 ?? ?? ?? ?? ?? 50 8D 4D

6A FF 68 ?? ?? ?? ?? 8D 4D C4 E8 ?? ?? ?? ?? 8D 45 C4 C7 45 EC 01 00 00 00 50 8D 4D 08 E8 ?? ?? ?? ?? C6 45 F3 00 84 C0 75 ?? C6 45 F3 01 F6 45 EC 01  //22-01-24 新特征码 [修改方法不变]

视频下载地址:https://pan.baidu.com/s/1O0ZVLFuhDpv1HWAnlVGqew 提取码:ri4i

PC微信防撤回破解教程

@byxiaoxie6 年前

03/25
13:40
Home

DC雷达Hosts地址检测器

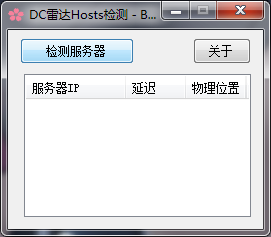
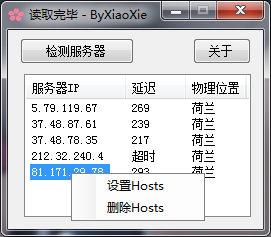
QQ截图20190312021239 DC雷达Hosts地址检测器

下载地址:https://pan.baidu.com/s/1H4jND-7YEe6y-gz7y7y6rA 提取码:y2wz
私人服务器是站长自己掏钱买的,请不要恶意破坏,赞助可以联系QQ:645993600添加的时候请写上内容!
更新日志:
V1.1:显示最新官方服务器地址
V1.2:修复物理位置错误
V1.3:添加延迟及丢包率检测
V1.4:添加新服务器列表
V1.5:添加切换语言[英语]
V1.6:单文件双语言[中英]

DC雷达Hosts地址检测器

@byxiaoxie6 年前

03/14
23:14
Home

Net-speed 一键脚本

此方法仅用与[ubuntu  debian  centos]系统
服务器:系统平台[Debian 8 x64]

小流量VPS不建议使用,因为使用 net-speeder 会消耗双倍流量

官方脚本:https://github.com/snooda/net-speeder
一键脚本[debian  ubuntu]使用

wget –no-check-certificate https://raw.githubusercontent.com/tennfy/debian_netspeeder_tennfy/master/debian_netspeeder_tennfy.sh

chmod a+x debian_netspeeder_tennfy.sh

bash debian_netspeeder_tennfy.sh

一键脚本[centos]使用

wget --no-check-certificate https://gist.github.com/LazyZhu/dc3f2f84c336a08fd6a5/raw/d8aa4bcf955409e28a262ccf52921a65fe49da99/net_speeder_lazyinstall.sh

sh net_speeder_lazyinstall.sh
查看 net-speeder 是否运行
ps aux|grep net_speeder|grep -v grep

停止net-speeder
killall net_speeder

启动net-speeder(KVM环境)
nohup /root/net_speeder eth0 "ip" >/dev/null 2>&1 &
启动net-speeder(openvz环境)
nohup /root/net_speeder venet0 "ip" >/dev/null 2>&1 &

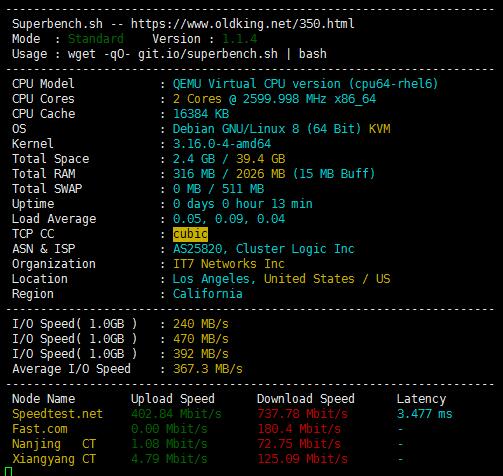
QQ截图20190314231253 Net-speed 一键脚本

Net-speed 一键脚本

@byxiaoxie6 年前

03/15
00:07
Home

irtt加速方案:单边拥塞算法TCPA

此方法仅用与[centos 7+]系统 KVZ架构  (其他自行测试)
服务器:系统平台[centos 7]
要求:boot分区不小于500M(太小可能导致安装内核失败)

一键脚本安装

wget http://down.08mb.com/tcp_opz/tcpa/tcpa.sh

sh tcpa.sh
新增端口 (默认只加速80,443,8080)

vim  /usr/local/storage/tcpav2/start.sh

找到["$ip" != "127.0.0.1"]后添加到if下面,fi结尾

$BINDIR/$CTLAPP access add tip $ip tport SS端口或其他端口
启动tcpa拥塞算法

cd /usr/local/storage/tcpav2
sh start.sh
查看是否开启成功

smod|grep tcpa

返回以下内容则启动成功

tcpa_engine           224249  0
卸载方法

cd /usr/local/storage/tcpav2

sh uninstall.sh

阅读全文 →

irtt加速方案:单边拥塞算法TCPA

@byxiaoxie6 年前

03/13
00:03
Home

C# 域名转IP地址

引用:using System.Net;
/// <summary>
/// 域名转IP
/// </summary>
/// <param name="domain">域名</param>
public static string getIP(string domain)
{
    domain = domain.Replace("http://", "").Replace("https://", "");
    IPHostEntry host = Dns.GetHostEntry(domain);
    IPEndPoint ip = new IPEndPoint(host.AddressList[0], 0);
    return ip.Address.ToString();
}

C# 域名转IP地址

@byxiaoxie7 年前

03/30
00:29
Home

Python 2.7 与 Python 3 从零教学

#hello.py
#!/usr/bin/env python
# -- coding: utf-8 --  #编码格式为 utf-8
# -*- coding: utf-8 -*- #编码格式为 utf-8

print 'Hello World'    #输出 Hello World
print 'Hello','World'  #print用逗号“,”分开会输出一个空格 ,所以会显示成 Hello World
print 'HelloWorld'     #输出 HelloWorld

name = raw_input("请输入你的名字:") #raw_input 输入 并把输入的值保存到变量 name
print name #输出变量 name 的值
print 'Hello,',name #输出 Hello 再输出 name 变量的值

#输入一个整数并判断 a 的值是否大于等于0
a = int(raw_input('请输入一个整数:'))
if a>=0:
    print a
else:
    print a

阅读全文 →

Python 2.7 与 Python 3 从零教学

加载中……